Picture this: a lush, green lawn stretching out before you like a vibrant carpet. Now imagine that same lawn marred by bumps and dips, making it more of an obstacle course than a relaxing oasis. Achieving a level lawn not only enhances the beauty of your outdoor space but also promotes healthier grass growth. In this guide, we will dive into the art of lawn leveling, from assessing your current situation to mastering the tools and techniques needed for a smooth and even surface. Say goodbye to uneven terrain and hello to a perfectly leveled paradise right outside your door!
The Importance of a Level Lawn
A level lawn isn’t just about aesthetics; it’s about functionality too. When your lawn is uneven, water can pool in low spots, leading to soggy patches and potential mold growth. Uneven terrain also makes mowing a chore as the mower bounces around, leaving an inconsistent cut. Additionally, a lumpy lawn can create tripping hazards for you and your guests.
By leveling your lawn, you not only improve its visual appeal but also ensure proper drainage and easier maintenance. A flat surface allows water to flow evenly across the turf, promoting healthy root development and preventing standing water issues.
Whether you use your lawn for playtime with kids or outdoor gatherings with friends, having a level surface provides a safe and enjoyable environment for all activities. So, take the time to assess your lawn’s level and consider the benefits of achieving that perfectly smooth expanse of greenery right outside your door!
Assessing Your Lawn’s Levelness
Before diving into the process of leveling your lawn, it’s crucial to assess its current level. Start by walking around your yard and visually inspecting for any noticeable low or high spots. These uneven areas can affect the overall appearance and health of your grass.
Another way to assess your lawn’s level is by using a string level or a longboard placed across different sections of the yard. This method helps identify areas that need attention before proceeding with the leveling process.
Pay close attention to areas where water pools after rain, as this indicates poor drainage caused by uneven surfaces. Additionally, mowing your lawn at different angles can reveal bumps or depressions that may not be immediately visible from eye level.
By thoroughly assessing your lawn’s level, you’ll have a better understanding of where adjustments are needed to achieve a smooth and healthy turf surface.
Tools Needed for Lawn Leveling
When it comes to leveling your lawn, having the right tools can make all the difference. Here are some essential tools you’ll need to get the job done efficiently and effectively.
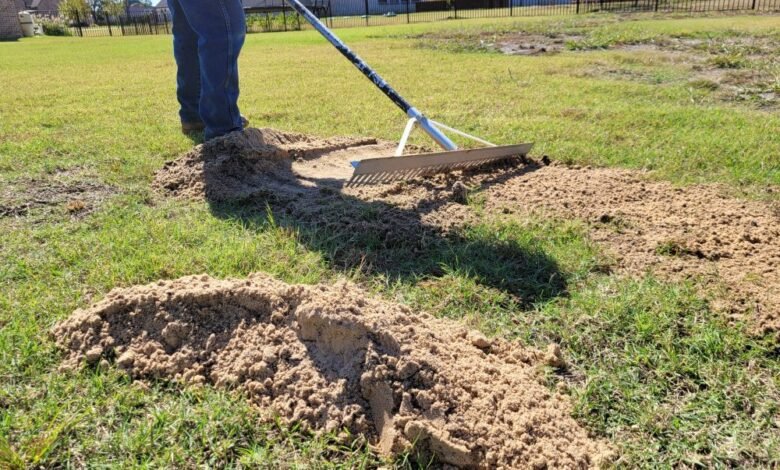
First up, a quality shovel or spade is key for removing excess soil or filling in low spots. A garden rake will help you spread topsoil evenly across the surface of your lawn.
A lawn roller can be handy for compacting freshly added soil, ensuring a smooth and level finish. A string level or laser level will help you check the evenness of your lawn throughout the process.
Consider investing in a sturdy wheelbarrow to transport materials easily around your yard. Don’t forget about gloves to protect your hands while working on this project.
Having these tools on hand will set you up for success as you tackle leveling your lawn like a pro!
Step-by-Step Guide to Leveling Your Lawn
When it comes to leveling your lawn, the process may seem daunting at first, but with a step-by-step guide, you can achieve that perfectly flat surface for a beautiful outdoor space.
Start by mowing your lawn to a short height so you can see the uneven areas. Use a shovel or garden rake to loosen compacted soil and remove any debris like rocks or branches. Next, spread topsoil over low spots and bare patches to even out the surface.
After spreading the topsoil, use a lawn roller filled with water to pack down the soil evenly. This will help prevent future sinkholes and keep your lawn level for longer periods. Reset any patched areas and water thoroughly.
By following these steps diligently, you’ll be on your way to achieving a professionally leveled lawn that will enhance the overall look of your home’s exterior space.
Tips for Maintaining a Level Lawn
Once you’ve gone through the effort of leveling your lawn, it’s essential to maintain its even surface for long-lasting results. One tip is to regularly inspect your lawn for any signs of unevenness or dips that may develop over time. By catching these issues early on, you can address them promptly before they worsen.
Another helpful tip is to mow your lawn at the appropriate height and frequency. Keeping your grass at an optimal length will promote a more consistent growth pattern and help prevent uneven areas from forming. Additionally, be mindful of heavy foot traffic or equipment usage that could compact the soil and create low spots.
Regularly aerating your lawn can also aid in maintaining a level surface by improving soil drainage and reducing compaction. Consider overseeding bare patches to encourage healthy grass growth and fill in any sparse areas that may contribute to an uneven appearance.
Common Mistakes in Lawn Leveling and How to Avoid Them
One common mistake in lawn leveling is not properly assessing the extent of the unevenness before starting the project. It’s crucial to thoroughly inspect your lawn to identify low and high spots accurately.
Another mistake to avoid is using the wrong type of topdressing material or applying it unevenly across the lawn. Make sure to choose a suitable topsoil mix and distribute it evenly for consistent results.
Overlooking proper watering after leveling can also lead to issues like soil compaction or erosion. Be mindful of keeping the soil adequately moist without overwatering.
Neglecting regular maintenance post-leveling, such as mowing too soon or infrequently, can undo all your hard work. Follow a maintenance schedule tailored to keep your leveled lawn in optimal condition.
By being aware of these common pitfalls and taking proactive steps to avoid them, you can ensure a successful lawn leveling project that yields lasting results.
Conclusion
Mastering lawn leveling is crucial for maintaining a healthy and beautiful lawn. By following the steps outlined in this guide, assessing your lawn’s levelness, using the right tools, and being mindful of common mistakes to avoid, you can achieve a level lawn that enhances the overall aesthetic appeal of your outdoor space. Regular maintenance will ensure that your lawn remains even and attractive year-round. So go ahead, put these tips into practice, and enjoy a perfectly leveled lawn that you can be proud of!