Introduction
Building with metal studs has become increasingly popular in both residential and commercial construction. They’re lightweight, straight, and resistant to warping but they require specific fasteners to secure drywall properly. Using the wrong screws can lead to loose panels, cracks, and costly repairs down the line.
Drywall screws serve as the critical connection between your drywall panels and the metal stud framework. Unlike wood screws, these specialized fasteners are designed to bite into metal without stripping or backing out over time. When you choose the right screw and install it correctly, you create a secure, long-lasting wall system that meets building codes and stands up to daily wear.
This guide walks you through everything you need to know about selecting and installing drywall screws for metal studs, from understanding thread types to avoiding common installation mistakes.
Understanding Drywall Screws for Metal Studs
Metal stud construction requires screws with specific design features that differ significantly from those used with wood framing.
Thread Design and Point Types
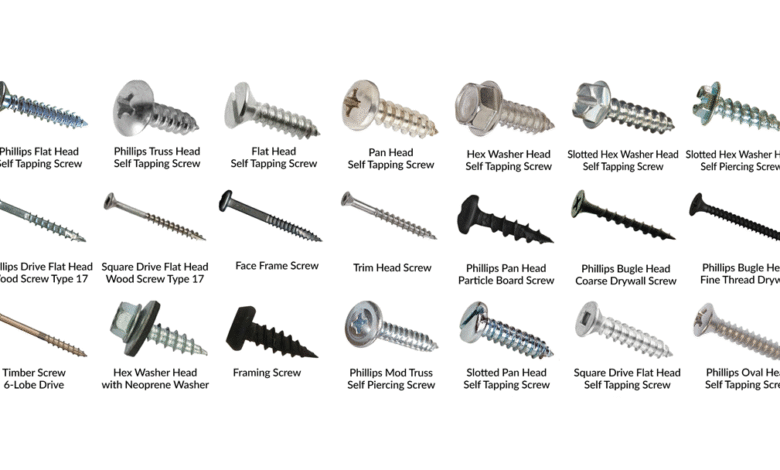
Fine-thread screws are the standard choice for metal studs. Their closely spaced threads create more contact points with the metal, resulting in superior holding power. The sharp point easily penetrates the steel stud without requiring pre-drilling in most applications.
Self-drilling screws feature a drill bit-like tip that cuts through metal studs efficiently. These work particularly well with thicker gauge studs where standard pointed screws might struggle to penetrate.
Size and Length Options
The most common screw lengths for metal stud applications range from 1 inch to 1-5/8 inches. Length selection depends on your drywall thickness:
- 1-inch screws work for single layers of 1/2-inch drywall
- 1-1/4-inch screws suit single layers of 5/8-inch drywall
- 1-5/8-inch screws accommodate double-layer applications
Head styles typically feature a bugle or trumpet shape that countersinks slightly below the drywall surface without tearing the paper facing.
Material and Coating
Quality drywall screws for metal studs use hardened steel construction with corrosion-resistant coatings. Phosphate coatings provide basic protection, while zinc coatings offer enhanced durability in humid environments.
Choosing the Right Screw for Your Project
Selecting appropriate screws depends on several key factors that directly impact installation success and long-term performance.
Metal Stud Gauge Considerations
Metal studs are available in different gauges, with lower numbers indicating thicker steel:
20-gauge studs (thickest) work well with standard fine-thread screws. The substantial metal thickness provides excellent thread engagement without requiring specialized fasteners.
25-gauge studs (most common) perform best with fine-thread screws that have aggressive threading. These create secure connections without over-penetrating the relatively thin metal.
26-gauge studs (thinnest) may require self-drilling screws or specialized fine-thread designs that minimize the risk of stripping or enlarging the hole.
Drywall Thickness Matching
Proper screw length ensures adequate penetration into the metal stud while avoiding over-penetration that can damage electrical or plumbing systems behind the wall.
For 1/2-inch drywall, choose screws that penetrate at least 3/8 inch into the metal stud. For 5/8-inch drywall, increase penetration to 1/2 inch minimum. These specifications meet most building code requirements and provide reliable holding power.
Load Requirements
Standard applications typically use #6 screws spaced 12 inches on center for field areas and 8 inches on center at panel edges. High-stress areas or commercial applications may require closer spacing or larger diameter fasteners.
Installation Techniques for Success
Proper installation technique determines whether your drywall system will perform reliably for decades or develop problems within months.
Preparation Steps
Start by ensuring your metal studs are plumb, straight, and properly aligned. Check for any damage or burrs that could interfere with drywall contact. Clean debris from stud faces where drywall will attach.
Mark stud locations on the floor and ceiling to guide screw placement. Use a chalk line or laser level to ensure consistent alignment across the entire wall surface.
Step-by-Step Installation Process
Step 1: Position the drywall panel against the metal studs, ensuring proper alignment with panel edges centered on studs.
Step 2: Begin fastening at the center of the panel and work outward. This technique prevents the drywall from bowing or developing air pockets.
Step 3: Drive screws perpendicular to the drywall surface. Angled screws reduce holding power and can cause paper tearing.
Step 4: Set screws to the proper depth slightly below the drywall surface without breaking the paper facing. Over-driven screws lose holding power and create weak spots.
Step 5: Maintain consistent spacing according to your project specifications, typically 12 inches on center in field areas.
Screw Depth and Torque Control
Use a screw gun with adjustable depth settings rather than a standard drill. This prevents over-driving, which is one of the most common installation errors. The screw head should create a slight dimple that can be filled with joint compound without breaking through the paper facing.
Common Mistakes to Avoid
Understanding typical installation errors helps you achieve professional results and avoid callbacks or repairs.
Over-Driving and Under-Driving
Over-driven screws break through the drywall’s paper facing, destroying the connection between the gypsum core and the screw head. This creates a weak spot that may eventually fail. Under-driven screws leave heads protruding above the drywall surface, making finishing difficult and creating visible bumps.
Incorrect Spacing
Spacing screws too far apart reduces the panel’s resistance to sagging and cracking. Spacing them too close wastes material and can weaken the drywall through excessive perforations.
Wrong Screw Selection
Using wood screws instead of metal stud screws often results in poor holding power and eventual failure. Wood screws have coarse threads that don’t engage effectively with thin metal studs.
Misaligned Installation
Driving screws at an angle reduces their holding power significantly. Always maintain perpendicular alignment between the screw and the drywall surface.
Ignoring Manufacturer Specifications
Different drywall and screw manufacturers may have specific requirements for their products. Always consult installation guides and follow recommended practices for your specific materials.
Essential Tools and Safety Considerations
Having the right tools and following safety protocols ensures efficient installation and protects you from injury.
Required Tools
A variable-speed screw gun with depth adjustment provides the best control for metal stud applications. Cordless models offer mobility, while corded versions provide consistent power for large projects.
Magnetic bit holders keep screws aligned and reduce drops. Use quality bits designed specifically for drywall screws cheap bits wear quickly and can strip screw heads.
A drywall square or T-square helps maintain straight cuts and proper panel alignment. A utility knife with sharp blades ensures clean cuts that don’t damage panel edges.
Safety Equipment
Safety glasses protect your eyes from metal shavings and debris that can fly during installation. Work gloves prevent cuts from sharp metal stud edges and provide better grip on materials.
Dust masks become essential when cutting or sanding drywall, as gypsum particles can irritate respiratory systems.
Workspace Safety
Keep your work area clean and well-lit. Metal studs have sharp edges that can cause cuts, especially in cramped spaces. Secure loose clothing and remove jewelry that could catch on materials.
Check for electrical wiring and plumbing before driving screws into walls. Metal conducts electricity, making shock hazards more dangerous than with wood construction.
Frequently Asked Questions
Can I use regular wood screws for metal studs?
No, wood screws have coarse threads designed for wood fibers. They don’t provide adequate holding power in metal and may strip out over time, leading to loose drywall panels.
How deep should screws penetrate into metal studs?
Screws should penetrate at least 3/8 inch into the metal stud for 1/2-inch drywall and 1/2 inch for 5/8-inch drywall. This ensures adequate thread engagement for proper holding power.
What’s the difference between fine-thread and coarse-thread screws?
Fine-thread screws have more threads per inch, creating better holding power in metal. Coarse-thread screws are designed for wood and don’t perform well with metal studs.
Do I need special tools for metal stud construction?
While you can use a standard drill, a screw gun with depth adjustment provides much better results. The depth control prevents over-driving, which is crucial for proper installation.
How do I know if I’m over-driving screws?
Over-driven screws break through the drywall’s paper facing, often tearing a small ring around the screw head. The screw head may also sink too deeply, requiring additional joint compound to level.
Can I reuse holes if I remove a screw?
It’s better to drive a new screw in a fresh location. Reused holes may not provide adequate holding power, especially in thin-gauge metal studs where the original hole may be enlarged.
Building Strong, Lasting Walls
Success with drywall screws and metal studs comes down to choosing the right fasteners and installing them correctly. Fine-thread screws designed specifically for metal provide the holding power you need, while proper installation techniques ensure your walls stay secure for years to come.
Take time to select screws that match your stud gauge and drywall thickness. Invest in quality tools that give you control over screw depth and alignment. Most importantly, don’t rush the installation process each screw plays a critical role in your wall system’s overall performance.
When you follow these guidelines, you’ll create professional-quality results that meet building codes and stand up to daily use. Your attention to detail during installation prevents callbacks and ensures satisfied customers who can trust in the quality of your work.